REVIEW · OSAKA
Osaka Photography Masterclass – Private Photography Lesson
Book on Viator →Operated by Aperture Tours · Bookable on Viator
Neon nights meet old Osaka in one lesson. This private 3-hour photography masterclass is built around practical instruction from professional photographer Irven (with Aperture Tours), then putting those ideas to work as you move through Shinsekai and Dotonbori. You’ll get hands-on help with camera settings and composition, not just vague “take a nice photo” advice.
My favorite part is how the instruction stays tied to what’s in front of you—light, angles, and the way the streets move—so your photos improve during the walk, not days later. One consideration: the tour doesn’t include a camera or tripod, so you’ll want to bring your own setup (or at least be ready to shoot with what you have, including a phone).
In This Review
- Key things to know before you go
- Osaka Photography Masterclass: what you’re learning in 3 hours
- Shinsekai to Dotonbori on the day tour (colour, angles, and street rhythm)
- Shinsekai and Tsutenkaku Tower: practice framing and contrast
- Dotonbori daytime: neon planning without the neon glow
- Dotonbori neon and long exposures on the night tour (motion and reflections)
- What long exposure changes for your photos
- The main advantage of learning it with a guide
- How the private lesson works with Irven (and why it matters)
- Price and value: is $170 per person a good deal?
- Day tour vs night tour: which one should you choose?
- Choose the day tour if you want
- Choose the night tour if you want
- What to bring (and how to prep so you get results fast)
- Bring
- Do a quick gear check before you meet
- Wear for shooting
- The meeting point and how the session flows
- Who this tour is best for (and who should skip it)
- Should you book the Osaka Photography Masterclass?
- FAQ
- How long is the Osaka Photography Masterclass?
- Where does the tour start?
- What areas of Osaka will the tour cover?
- Is this a private tour?
- Who will guide the session?
- Is a camera included?
- Do I need a tripod for the tour?
- Are there day and night options?
- Can I use a phone instead of a camera?
- What is the cancellation window?
Key things to know before you go
- Irven’s teaching style is hands-on: you get personalised guidance for camera settings and composition as you shoot.
- You’ll photograph two iconic areas: Shinsekai (with Tsutenkaku Tower) and Dotonbori (neon signs and canal reflections).
- Day vs night changes the goal: the day tour focuses on colourful streets; the night tour is built for motion and long exposures.
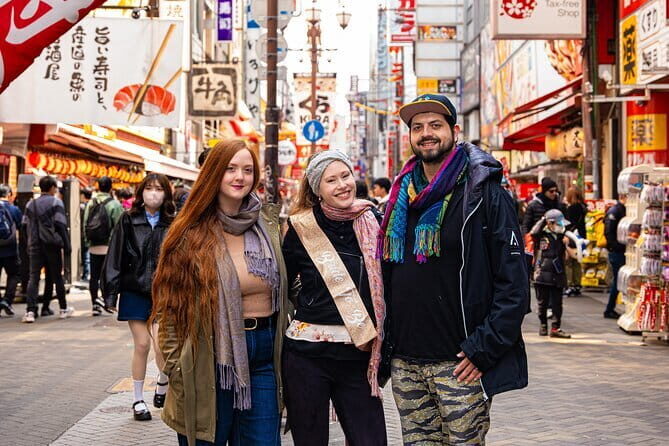
- Private means your pace: you’re not rushed, and the session can be tailored to your skill level.
- Bring your own gear: no camera or tripod is included, so plan ahead.
- It’s popular: booking is often made about 72 days in advance, so don’t wait until the last week.
Osaka Photography Masterclass: what you’re learning in 3 hours
This is a lesson you can actually use right away. You’re not just getting a walk with a guide. You’re getting direction that connects to three things photographers obsess over: how light behaves, how framing works, and how your camera settings change the result.
The big value is that the tour is private. That sounds like marketing, but in practice it means Irven can slow down when something’s confusing, or push you forward when you’re ready. If your photos are currently “pretty good but random,” this format helps you make them repeatable.
Another smart touch is the focus on Osaka’s contrasts. You’re shooting places where neon signs, reflections, and everyday street scenes share the same frame. That’s exactly the kind of environment where technique matters. In other words: the city is doing half the work for you—then Irven teaches you how to capture it.
You can also read our reviews of more private tours in Osaka

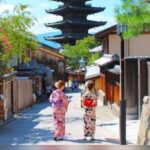
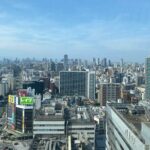
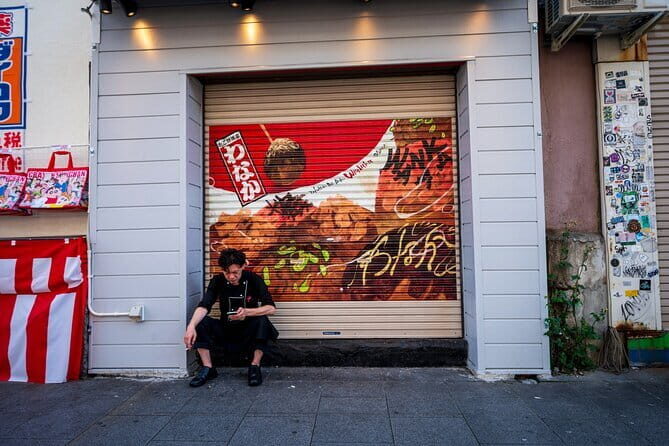
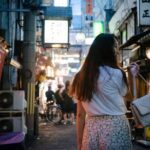
Shinsekai to Dotonbori on the day tour (colour, angles, and street rhythm)
The day option starts in Shinsekai, moves through Tsutenkaku Tower territory, and then heads to Dotonbori. The theme is colour and street character. Think older streets with a nostalgia vibe, then the brighter, sign-heavy energy of Dotonbori.
Shinsekai and Tsutenkaku Tower: practice framing and contrast
Shinsekai is a good place to learn because it’s visually busy without being only one kind of photo. You can work on:
- Leading lines and subject separation (so your main subject doesn’t blend into background clutter)
- Angle choice (straight-on vs low perspective vs looking across streets)
- When to include context vs when to zoom in on details
Tsutenkaku Tower gives you a clear vertical anchor. That makes composition easier. You can practice balancing the tower with signage, people, and nearby architecture instead of wrestling with a scene that has no structure.
A quiet benefit here: daylight helps you understand what you’re doing. When you can see the scene clearly, you can better connect Irven’s suggestions to results—then you carry that confidence into night photos later.
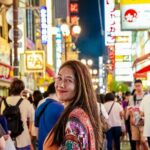
Dotonbori daytime: neon planning without the neon glow
Dotonbori is famous for its neon signs and canal reflections, but during the day it teaches a different lesson: how signage and architecture still tell a story without relying on darkness. Here’s what you’ll likely focus on:
- Typography as a subject (signs, placement, and readable shapes)
- Texture and edges (walls, railings, shopfronts)
- Background cleanup (choosing viewpoints where distractions disappear)
The real drawback of daytime shooting? You have to work harder to make your photos feel “night-level dramatic,” because you’re missing the glow. The payoff is that it’s excellent practice for framing and composition. Once you’ve got those down, the night tour becomes much easier.
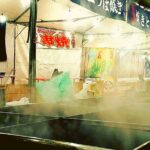
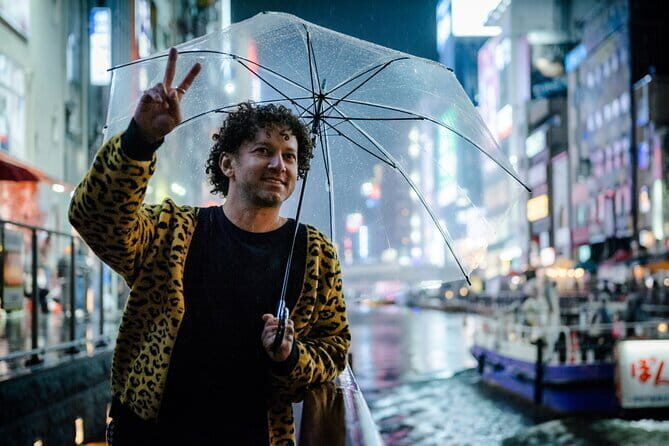
Dotonbori neon and long exposures on the night tour (motion and reflections)
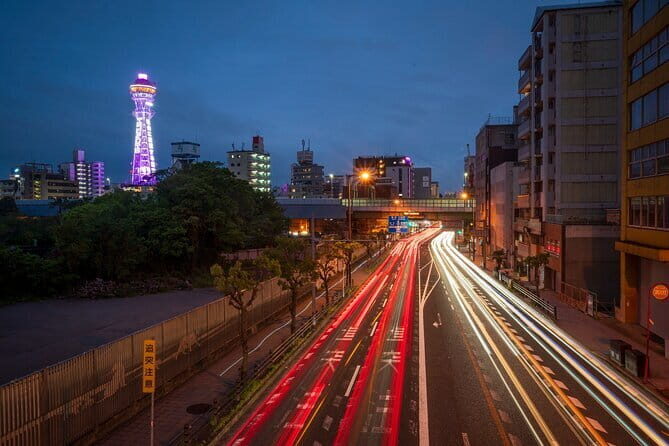
If you want the classic Osaka look—signs blazing, water reflecting, and streets turning into light trails—pick the night tour.
This one is built around Dotonbori as your studio. The guiding goal is long exposure and night photography, including how to capture the motion of the city. That means you’re learning how to balance three competing forces:
- bright neon (which can blow out highlights)
- darkness (which tempts you into shaky shots)
- movement (people and boats create streaks if timed right)
You can also read our reviews of more photography tours in Osaka

What long exposure changes for your photos
Long exposure is not only “make it blurry.” Done well, it makes the street feel cinematic while keeping the scene readable. You’ll be working on technique choices like:
- Shutter speed decisions (how long is too long for the exact crowd level)
- Stability and handling (since a tripod isn’t included, you may need alternate ways to steady)
- Exposure control so neon doesn’t turn into a white smear
Night photography also reveals details you miss in daylight. Reflections on canal edges, glow bouncing off wet pavement, and sign lighting patterns can make your framing feel more intentional.
The main advantage of learning it with a guide
Trying long exposure alone often leads to two problems: you don’t know which setting caused the result, and you end up with too many similar photos. With Irven’s guidance, you can correct in real time—so your shots evolve instead of stacking up into “maybe” files.
Also, night feels chaotic to many people. The guide’s job is to help you slow down and find repeatable compositions even when the street is loud and busy.
How the private lesson works with Irven (and why it matters)
Irven’s role, based on the experience feedback you shared, is not just showing where to stand. He explains what’s happening at each stop and takes his time with people. That’s a big difference between a photo walk and a true lesson.
Here’s what that usually looks like during a good masterclass:
- He watches how you shoot and quickly identifies your biggest bottleneck.
- He gives you instruction tied to the exact scene you’re facing.
- You try, check, adjust, and repeat—while the light is still right.
Two details are especially useful for you:
- You can bring your own phone. One review specifically noted that the techniques still apply even when shooting on an iPhone, so the learning isn’t only for people with advanced cameras.
- You’ll get practical coaching, not abstract theory. The feedback points to useful tips that translate into better photos, including composition and how to work a street scene.
If you’re bringing a camera and already know your basics, you’ll likely move faster. If you’re starting from scratch, the private setup means you don’t have to keep up with a group pace.
Price and value: is $170 per person a good deal?
At $170 per person for about 3 hours, this is not the cheapest activity in Osaka. But it’s also not trying to be a “look at sights” product.
You’re paying for:
- A professional photographer guide
- A local guide
- A private format (your group only)
- Teaching that’s tied to settings, composition, and the specific locations you’re visiting
For many people, the real question is opportunity cost. If you’re going to spend part of your day trying to self-teach at night, you can burn time without getting clear direction. Here, the tour compresses learning into the time you’re actually in the streets.
It’s also worth noting that the experience tends to get booked ahead (about 72 days on average). That’s often a sign people come back for the value, not just the scenery.
If you’re the type who likes to learn by doing—hands-on, in the moment—this price tends to make sense. If you only want casual sightseeing photos with no desire to change settings, a standard walking tour may feel better value.
Day tour vs night tour: which one should you choose?
Pick based on what kind of photos you want most.
Choose the day tour if you want
- easier light for learning composition
- colourful street scenes in Shinsekai and Dotonbori
- a calmer feeling compared with night crowds
- a foundation you can later apply at night
Choose the night tour if you want
- the classic neon Osaka look
- long exposure practice and capturing motion
- reflections and glow effects near the canal area
- a more technique-focused photography session
If you’re only in Osaka for a short window and you can handle night shooting, the night tour is often the bigger “wow” payoff. If you’re unsure about your gear or stability, the day tour can build confidence first.
What to bring (and how to prep so you get results fast)
Since the tour doesn’t include a camera or tripod, your prep matters.
Bring
- Your own camera or phone
- Your usual charging solution (battery drains faster in cold night conditions)
- If you have one: a small way to steady shots (even if it’s not a full tripod)
Do a quick gear check before you meet
The reviews you provided include one important point: understanding your camera makes the experience more enjoyable. You don’t need to be a technical wizard, but it helps if you can answer:
- How do you change exposure settings?
- How do you switch modes?
- Where are your key controls?
If you’re shooting on a phone, the lesson still applies, but make sure you know how to adjust or use whatever night mode or exposure tools you have.
Wear for shooting
This is a street walk. You’ll want shoes that work for standing and repositioning. Also dress for weather, because you’ll be outside during your session.
The meeting point and how the session flows
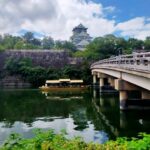
You meet at 3-21 Ōsakajō, Chuo Ward, Osaka, 540-0002, Japan. The tour ends back at the meeting point, so you’re not stuck figuring out transport when your legs are tired or your card is full.
Because it’s private, expect the flow to follow the day’s light and what Irven wants to teach at each stop. You may start a bit earlier if that fits the session better—one review noted they asked about starting early.
Who this tour is best for (and who should skip it)
This works especially well if you’re:
- learning photography and want direct coaching instead of guesswork
- curious about street and night techniques
- shooting with a camera or phone and want your images to look more intentional
- someone who enjoys walking city streets more than sitting in one place
It may be less ideal if:
- you don’t want to think about settings or composition at all
- you’re not willing to bring and use your own equipment (since no camera or tripod is included)
- you mainly want a general sightseeing route without instruction
One more practical note: the tour description says most people can participate, and service animals are allowed. If you have concerns about timing or how much standing you can do, it’s worth messaging the provider before you book.
Should you book the Osaka Photography Masterclass?
If you want photos that look like you planned them, not photos that look like you got lucky, I’d book it. The private setup plus Irven’s explanations—and the fact that techniques apply even when using an iPhone—makes the session feel like a real investment in your skills.
I’d only skip it if you’re strictly chasing cheap thrills or you already know exactly how you want to shoot neon and street scenes. Otherwise, you’ll come away with better habits: how to frame, how to read lighting, and how to turn Osaka’s neon chaos into images you’ll actually want to keep.
FAQ
How long is the Osaka Photography Masterclass?
The experience runs for about 3 hours.
Where does the tour start?
It starts at 3-21 Ōsakajō, Chuo Ward, Osaka, 540-0002, Japan.
What areas of Osaka will the tour cover?
The day tour runs from Shinsekai (including Tsutenkaku Tower) to Dotonbori. The night tour focuses on Dotonbori for neon and night photography.
Is this a private tour?
Yes. It’s private, and only your group participates.
Who will guide the session?
You’ll have a local guide and a professional photographer guide (Irven is named in the reviews you provided).
Is a camera included?
No. A camera is not included.
Do I need a tripod for the tour?
A tripod is not included. If you need one for your shooting style, bring your own.
Are there day and night options?
Yes. There is a day tour option and a night tour option, with different photography goals.
Can I use a phone instead of a camera?
Yes. The guidance and techniques can still apply if you’re shooting on an iPhone.
What is the cancellation window?
Free cancellation is available up to 24 hours in advance for a full refund.