REVIEW · OSAKA
Osaka-Nara: 2-Day Discovery Pass
Book on GetYourGuide →Operated by LINKTIVITY Inc. · Bookable on GetYourGuide
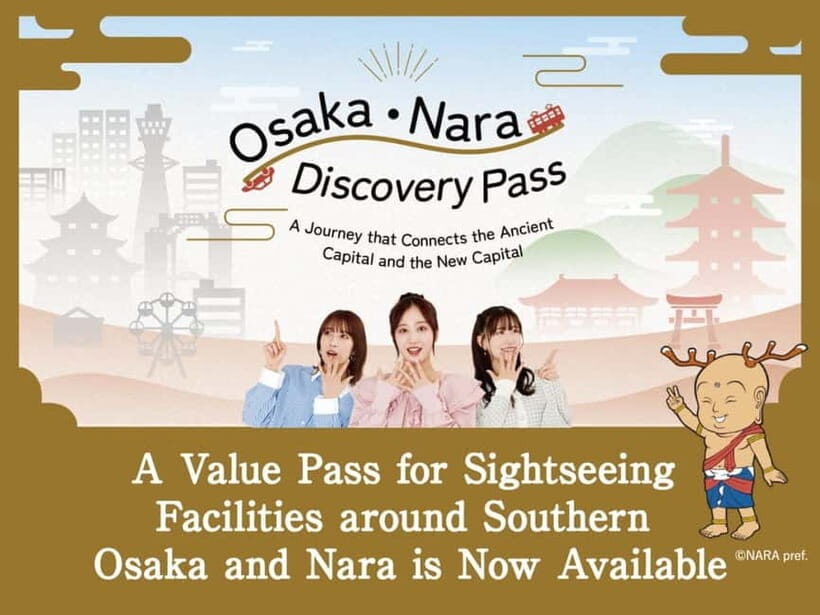
One QR code runs the whole plan. The Osaka-Nara Discovery Pass is a simple way to stack admissions across Osaka and Nara without buying tickets one by one. I love the one-ticket convenience (scan in, go enjoy) and the mix of big-ticket stops like Umeda Sky Building and Nara’s top temples. The catch is timing: some attractions are only free before 5:00 PM, and you can’t assume re-entry works after that.
The pass is centered in HEP FIVE Mall, so you can start day one near food, transit, and the Umeda skyline area. It’s also a pass built for planning: you’re limited to one free entry per facility, you can’t re-enter the same place, and you have to wait at least 30 minutes before moving on to the next admission. If you hate rules, it may feel strict. If you like a clear game plan, it’s a fun way to travel.
In This Review
- Key takeaways before you go
- What this pass really is: Osaka + Nara admissions by QR
- HEP FIVE: the practical start point and the 5:00 PM warning
- Northern Route (17 attractions): Umeda heights, Tsutenkaku angles, then Nara culture
- Umeda Sky area: Umeda Sky Building and Floating Garden Observatory
- HEP FIVE zone: HEP FIVE, Tsutenkaku, and the Ferris Wheel
- Water and ship experiences: Osaka Water Bus Aqua Liner and cruise options
- Temples with atmosphere: Shinyakushiji, Saidaiji, and Gangoji (World Heritage)
- Gardens and art: ISUIEN Garden Neiraku Museum of Art
- Nara special-interest stops: photography, reptile, goldfish, and calligraphy
- Southern Route (19 attractions): castles, onsen breaks, and the car-required plan
- Cycling-focused stops: Shimano Bicycle Museum and cycle sports center
- Osaka/Sakai-area cultural sites: Rikyu and Akiko, plus Kishiwada Castle
- Sumo and temples: Kehayaza, Abe Monju-in, and Okadera
- Nara and beyond: Kashihara archaeology, Ishibutai Tumulus, and Murouji
- Sacred peak vibes: Kinpusenji Temple and Yoshimizu Shrine
- Onsen day: Inunakiyama and multiple hot spring centers
- Limestone cave and monorail-style fun: Menfudo Limestone Cave
- The rules that make or break your day: QR, one visit, 30 minutes, no 48-hour assumption
- It’s valid across two days, not a free-for-all 48 hours
- One free entry per facility, once per use period
- You must wait at least 30 minutes between facilities
- Collective use is required
- Public transport isn’t included
- Price and value: when $24 makes sense (and when it doesn’t)
- Who this pass fits best
- Should you book the Osaka-Nara Discovery Pass?
- FAQ
- How much is the Osaka-Nara Discovery Pass?
- What’s included in the pass price?
- Does the pass cover train and bus fares?
- Is the pass valid for a full 48 hours?
- Can I get free entry to Floating Garden Observatory after 5:00 PM?
- Can I re-enter the same facility using the pass?
- Do I need a rental car for the Southern Route?
Key takeaways before you go
- One QR code, many admissions: each facility is a separate free-entry window you claim once.
- HEP FIVE is your hub: easy to base yourself near Umeda and keep your day efficient.
- Floating Garden Observatory has a cutoff: free admission only before 5:00 PM.
- No re-entry means plan your order: once you’re done at a facility, you’re done for the pass.
- Southern route needs a rental car: that changes the whole logistics math for your day.
- You must respect the 30-minute rule: build buffer time between stops.
What this pass really is: Osaka + Nara admissions by QR
The Osaka-Nara Discovery Pass is priced at $24 per person and is designed to cover admissions at a set list of attractions across two regions. Instead of buying individual entry tickets, you scan your digital pass at each site that’s included.
That’s the big idea: it turns Osaka and Nara from two separate shopping lists into one admissions system. It also matters that the pass is digital. You’ll want your phone ready (and yes, the rules say to disable dark mode, likely so the ticket scans cleanly).
Two other rules shape the experience more than people expect:
- One free entry per facility during your use period.
- No re-entry to the same facility (so if you think you’ll pop back later, don’t count on it).
You can also read our reviews of more tours and experiences in Osaka
HEP FIVE: the practical start point and the 5:00 PM warning
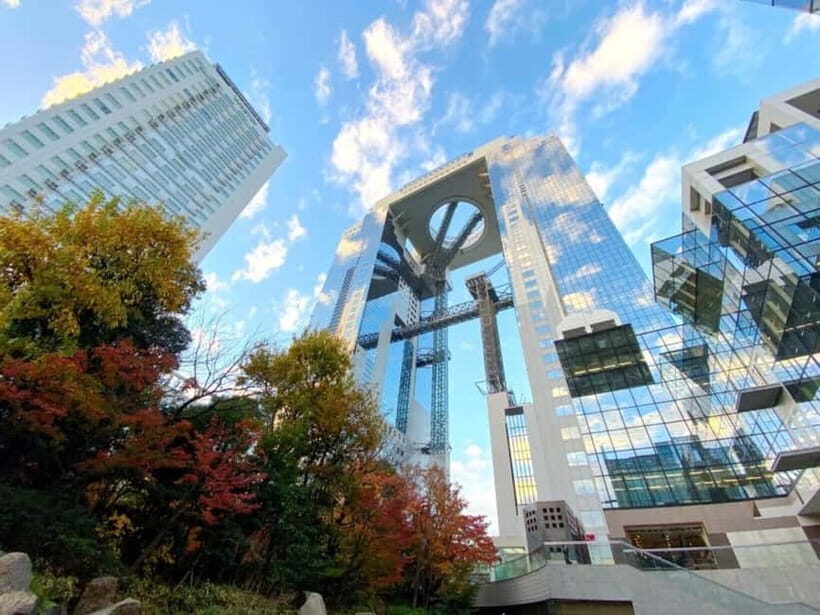
The pass is located in HEP FIVE Mall, which is a smart choice for a day-trip style route. You’re in Umeda, close to major transit, and surrounded by food options if you need a quick reset between temple stops and museum stops.
One attraction is especially important for planning: Floating Garden Observatory (at Umeda Sky Building). With the pass, free admission is valid before 5:00 PM only. After that, you may need to pay, and that’s where disappointment can happen.
A practical way to use this: treat the skyline portion as a timed appointment. If you want the views and the included entry, schedule it earlier in the day. If you’re the kind of traveler who wanders and runs late, you might end up outside the window.
Also note this operations warning: the HEP FIVE Ferris Wheel is scheduled to be out of service on Thursday, August 7th, due to inspection. The notice says it resumes after inspection is complete, but there’s no set time. If your plan includes that wheel, check closer to your dates.
Northern Route (17 attractions): Umeda heights, Tsutenkaku angles, then Nara culture
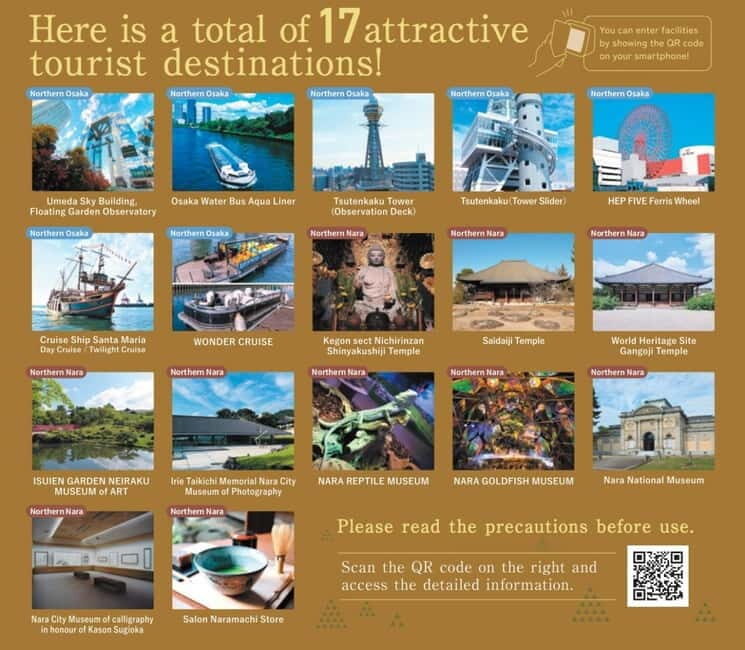
You’ll pick either the Northern route set or the Southern route set, and the Northern route is the easier one to wrap into a standard two-day rhythm. Think of it as a line that goes from Umeda’s modern skyline energy into Osaka’s classic neighborhoods, then all the way into Nara’s temple-and-museum side.
Here’s how the Northern list breaks down, and what you should expect at each stop.
Umeda Sky area: Umeda Sky Building and Floating Garden Observatory
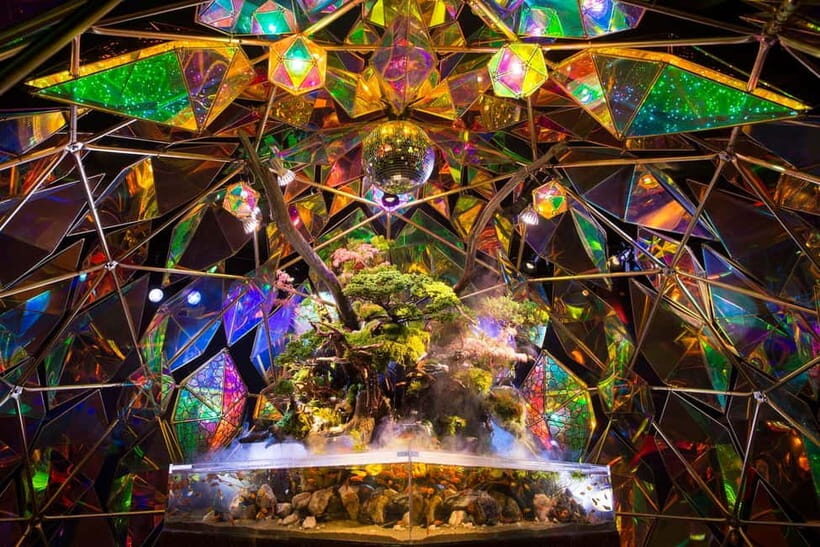
Start with Umeda Sky Building and its Floating Garden Observatory. This is your big vertical reward: open views over the city, plus the “I’m in Osaka” moment you can’t get from street level.
The key drawback is that Floating Garden Observatory free entry is only before 5:00 PM. If you want a relaxed visit, go earlier. If you’re okay with a strict schedule, you can plan a tight morning-to-early-afternoon loop.
HEP FIVE zone: HEP FIVE, Tsutenkaku, and the Ferris Wheel
Next comes the HEP FIVE area. That’s not just for shopping—it’s tied into some included attractions like the HEP FIVE Ferris Wheel.
Then head toward Tsutenkaku Tower and Tsutenkaku (Tower Slider). This is a different vibe from Umeda. Tsutenkaku is Osaka’s old-school landmark energy: more character, less glossy skyline.
If you’re chasing views, Tsutenkaku Tower gives you a classic angle on the city. If you’re chasing fun, the Tower Slider adds a more playful, action-leaning moment. The Ferris wheel is weather-dependent in real life, so bring flexibility if you’re going around that Aug 7 inspection window.




Water and ship experiences: Osaka Water Bus Aqua Liner and cruise options
For a change of pace, include the Osaka Water Bus Aqua Liner. Water routes can be a welcome break when your feet are tired.
The Northern list also includes:
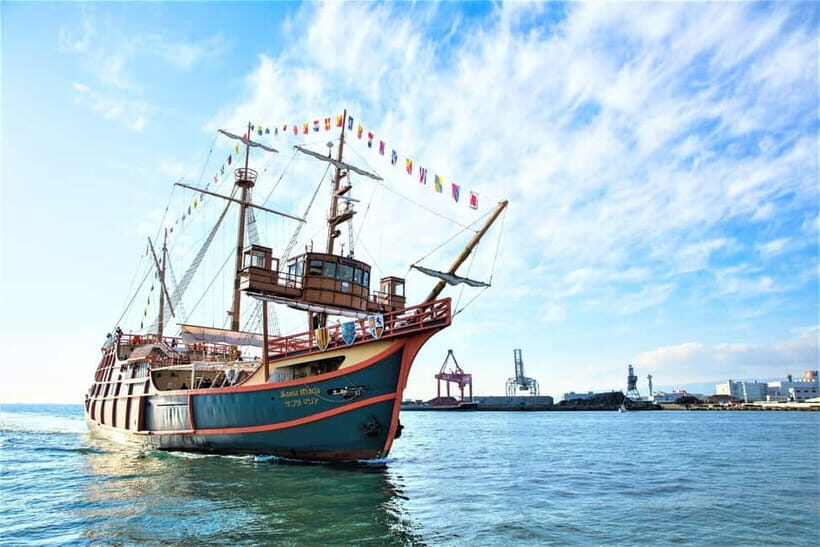
- Cruise Ship Santa Maria Day Cruise
- Cruise Ship Santa Maria Twilight Cruise
- WONDER CRUISE
This is where the pass can feel extra valuable: you’re not just touring buildings and temples. You’re adding a moving view of Osaka.
The drawback is timing. Cruises tend to run on schedules, and your included entry is one ticket in a system with no re-entry. So you’ll want to match your cruise time to the day plan rather than treating it as an afterthought.
Temples with atmosphere: Shinyakushiji, Saidaiji, and Gangoji (World Heritage)
Now switch to quieter, more traditional stops.
- Kegon sect Nichirinzan Shinyakushiji Temple
- Saidaiji Temple
- World Heritage Site Gangoji Temple
Gangoji being World Heritage is the headline. Even if you don’t go deep on architecture details, it’s one of those places that feels worth slowing down for. Shinyakushiji and Saidaiji are more for the temple rhythm—walking through grounds, seeing how the spaces feel different from the modern skyline earlier in the day.
Gardens and art: ISUIEN Garden Neiraku Museum of Art
Next, go for ISUIEN Garden and the Neiraku Museum of Art. This is a classic Osaka-Nara pairing: you can shift from sacred space to a calmer, curated-feeling experience without leaving your included-ticket flow.
If you prefer variety over repetition, this stop is a good mid-day reset.
Nara special-interest stops: photography, reptile, goldfish, and calligraphy
Nara isn’t only temples. This route also gives you some very specific museums, and that’s a major reason the pass can feel like more than a sightseeing checklist.
Included:
- Irie Taikichi Memorial Nara City Museum of Photography
- NARA REPTILE MUSEUM
- NARA GOLDFISH MUSEUM
- Nara City Museum of calligraphy in honour of Kason Sugioka
- Salon Naramachi Store
- Nara National Museum
This mix is excellent if you like texture: one museum might teach you how photography shapes memory, another might be more playful (reptiles and goldfish), and calligraphy gives you a cultural lens that’s easy to enjoy without needing background.
The only real drawback here is pacing. It’s easy to stack too many indoor stops in one afternoon. Use the 30-minute rule and build breathing space.
Southern Route (19 attractions): castles, onsen breaks, and the car-required plan
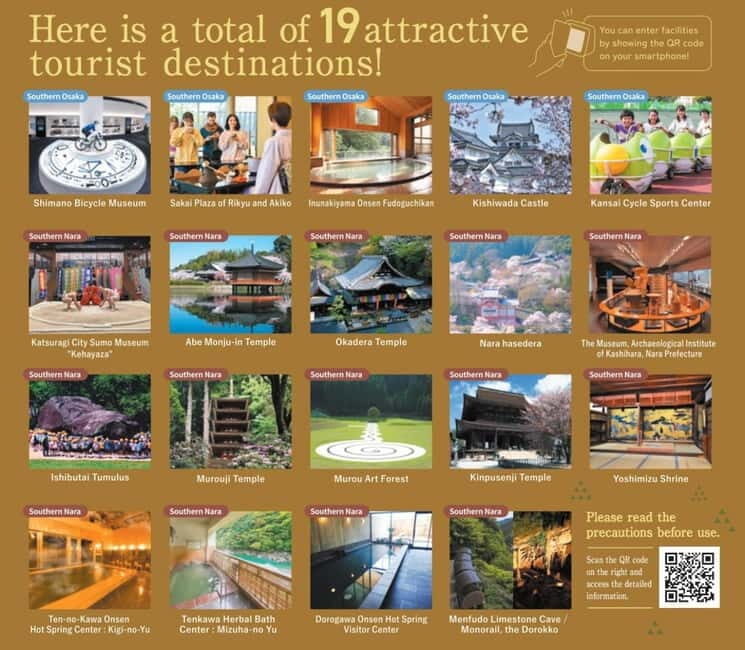
The Southern route is the “you really want a day with variety” option. It includes castles, multiple onsen spots, and even a limestone cave with a monorail-style element.
But there’s a major logistical note: if you choose this route, you need to book a rental car separately from the ticket. That’s not a small detail. It affects cost, planning, and how spontaneous your schedule can be.
Here’s what you’re signing up for on the Southern list.
Cycling-focused stops: Shimano Bicycle Museum and cycle sports center
You’ll find:
- Shimano Bicycle Museum
- Kansai Cycle Sports Center
If bikes are your thing, these are the kind of stops you can’t easily replicate on a standard train day. Even if you’re not a cycling superfan, museums like this often give you a hands-on, practical look at technology and design.
Osaka/Sakai-area cultural sites: Rikyu and Akiko, plus Kishiwada Castle
Included:
- Sakai Plaza of Rikyu and Akiko
- Kishiwada Castle
This pairs a name-brand cultural facility with a castle stop that usually rewards you for walking the grounds and taking in the view.
A drawback with castle visits is time use. They can be faster than you think, or they can drag if you’re checking every detail. With the pass rules, plan to finish without needing re-entry.
Sumo and temples: Kehayaza, Abe Monju-in, and Okadera
Included:
- Katsuragi City Sumo Museum Kehayaza
- Abe Monju-in Temple
- Okadera Temple
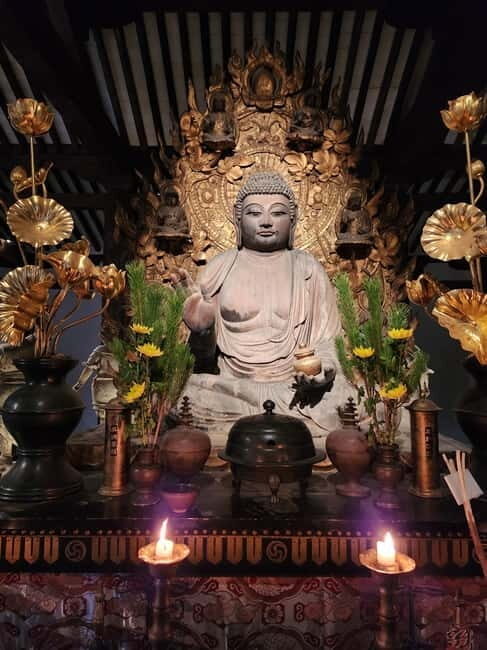
- Nara hasedera (Hasedera)
If you like playful side culture, Kehayaza adds personality to a day that otherwise includes temples and baths. Hasedera is the anchor here; it’s the one that feels most likely to be your signature photo and walking-time moment.
Nara and beyond: Kashihara archaeology, Ishibutai Tumulus, and Murouji
Included:
- The Museum, Archaeological Institute of Kashihara, Nara Prefecture
- Ishibutai Tumulus
- Murouji Temple
- Murou Art Forest
This is the “more ground, fewer ticket lines” section. Archaeology and tumulus sites are good if you enjoy learning through place—standing where history is physically present.
Sacred peak vibes: Kinpusenji Temple and Yoshimizu Shrine
Next:
- Kinpusenji Temple
- Yoshimizu Shrine
These are classic temple/shrine style stops. With a car-based route, you’ll be able to shift between them efficiently, which matters when you’re working around the pass’s facility timing rules.
Onsen day: Inunakiyama and multiple hot spring centers
The Southern route is very onsen-forward:
- Inunakiyama Onsen Fudoguchikan
- Kigi-no-Yu at Ten-no-Kawa Onsen Hot Spring Center
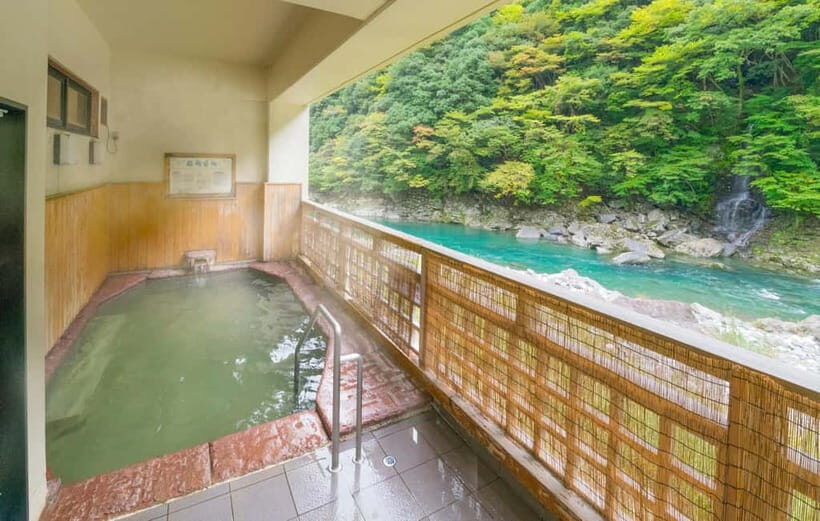
- Mizuha-no Yu at Tenkawa Herbal Bath Center
- Dorogawa Onsen Hot Spring Visitor Center
This is one of the best reasons to consider the Southern route if you like recovery time. Instead of packing only temples and museums, you get built-in breaks. That said, onsen experiences can be longer than sightseeing. So don’t stack them back-to-back unless you know you’ll move quickly.
Limestone cave and monorail-style fun: Menfudo Limestone Cave
Included:
- Menfudo Limestone Cave / Monorail
- plus Dorokko (listed as part of the cave/experience)
If you want a “wow, that’s different” stop, caves tend to deliver. The drawback is practical: caves can be damp, and you’ll want proper shoes and a clear plan for how much time you’ll need there before your next facility.
The rules that make or break your day: QR, one visit, 30 minutes, no 48-hour assumption
This pass is designed to be simple, but the fine print is where your experience lives.
It’s valid across two days, not a free-for-all 48 hours
The pass says it is valid from the facility’s opening time to the final entry time on the day of use and the following day. It is not valid for a full 48 hours from when you first start.
So if you activate it late in the afternoon, you might “lose” some of the morning coverage. The smart move is to start earlier rather than later.
One free entry per facility, once per use period
You get free admission to each facility once within the two-day period and it’s limited to the day you use the facility. You can’t re-enter the same place later with the pass.
That’s why Floating Garden Observatory timing is such a big deal. If you’re thinking about a sunset view and a second entry, you may pay a chunk of the ticket cost if your second attempt falls outside the included free window.
You must wait at least 30 minutes between facilities
After you visit one facility, you must wait at least 30 minutes before entering another included site.
This is the rule that turns a dream route into a realistic schedule. It forces you to plan transitions and allows buffer time if you stop for a snack or walk around a neighborhood.
Collective use is required
The pass notes that all participants are required to use the facilities collectively; individual use isn’t allowed. I’d treat that as a sign you should follow the planned flow together, especially if you’re using this with a group rather than solo.
Public transport isn’t included
The pass price covers the included facilities. Train and bus costs are not covered. If you’re using public transit for your Osaka-to-Nara movement, factor that in when judging value.
Price and value: when $24 makes sense (and when it doesn’t)
On paper, $24 is the kind of price that can feel almost too good. The pass can deliver value if you hit multiple included attractions that you would otherwise pay for individually—especially the higher-ticket draws.
The biggest value multipliers on the Northern route are:
- Umeda Sky Building / Floating Garden Observatory (but only free before 5:00 PM)
- Tsutenkaku Tower and Tower Slider
- Water bus and cruise options like Santa Maria day/twilight cruises and WONDER CRUISE
Those are the stops that often cost more if you buy one-off tickets. Add in Nara’s museums and temple entries, and $24 can stretch fast.
Where the value can drop:
- If you arrive too late for the 5:00 PM free window, you may end up paying most of the cost for the skyline observatory rather than using the pass as intended.
- If you pick a route and then decide you want to return to a facility later, no re-entry can make you feel stuck with a plan you can’t bend.
One more value note: some combo options can add transit passes.
- If you select the Osaka-Nara Discovery Pass & Railway Ticket Combo, you can get a 1-day Osaka Metro & Osaka City Bus Pass and a 2-day Kintetsu Rail Pass (Osaka-Namba to Kintetsu-Nara). That combo can improve the math if you’re using transit frequently.
Who this pass fits best
This pass fits travelers who:
- Like a clear plan and want to reduce ticket-buying friction.
- Enjoy a mix of skyline, temples, and special-interest museums (photography, reptiles, goldfish, calligraphy).
- Are willing to schedule around timing rules, especially the Floating Garden Observatory cutoff.
It may not fit travelers who:
- Hate schedule constraints or late starts.
- Want free re-entry or flexible “come back later” decisions.
- Are planning a Southern route day without seriously thinking through the rental car requirement.
Should you book the Osaka-Nara Discovery Pass?
If you’re the type who can start earlier and follow the rules, I think it’s worth serious consideration. The pass shines when you stack a few higher-cost attractions and don’t miss the before-5:00 PM window for Floating Garden Observatory.
If you tend to run late, prefer free-form wandering, or assume you can redo attractions later, you could end up paying for the parts that don’t match the included conditions.
My decision shortcut: book it if you want structure and you’ll hit several included stops in a tight two-day window. Skip it (or use it more cautiously) if you want total flexibility and zero timing pressure.
FAQ
How much is the Osaka-Nara Discovery Pass?
It’s listed at $24 per person.
What’s included in the pass price?
You get one free entry per included facility during the pass’s use window. Some combo options also include transit passes, depending on what you select.
Does the pass cover train and bus fares?
No. Public transportation costs, including trains and buses, are not covered in the price.
Is the pass valid for a full 48 hours?
No. It is valid from the facility’s opening time to the final entry time on the day you use it and the following day, not a full 48 hours starting from first use.
Can I get free entry to Floating Garden Observatory after 5:00 PM?
The pass says free admission for Floating Garden Observatory is valid before 5:00 PM only.
Can I re-enter the same facility using the pass?
No. Re-entry to the same facility is not allowed.
Do I need a rental car for the Southern Route?
Yes. If you choose the Southern Route, you need to book a rental car separately from your ticket.